Candied Pretzel Rods
Last month I had the privilege of hosting a wedding shower for a dear family member who is tying the knot in holy matrimony in just a few short weeks. The shower was a simple affair held on the bluffs overlooking the gorgeous Pacific Ocean and entailed a down-to-earth picnic of chicken, pasta salad, spinach salad, potato salad, watermelon and ice tea. Oh, and of course the onigiri (rice balls) that my Mom insisted we absolutely needed if there was to be chicken at the picnic. ;) I’m so glad she insisted. (Photographed above are the fun pretzel rods that Bebe and I made together.)
For the shower favors, again I wanted to keep it simple and gift something that our family and friends could take home and enjoy later. I already had individually boxed cupcakes as dessert for the taking or for enjoying at the party so when I was brainstorming I remembered Bebe received an individually wrapped candied pretzel rod from one of her classmates when they were leaving our school and it was simple, playful, and delicious (yes, Bebe kindly shared a sweet bite with me).
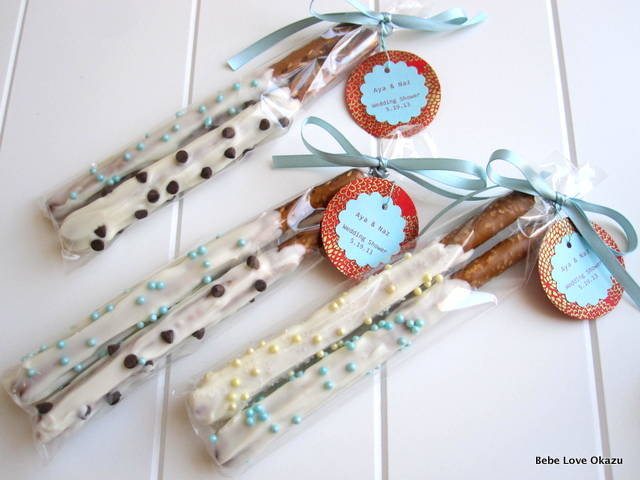
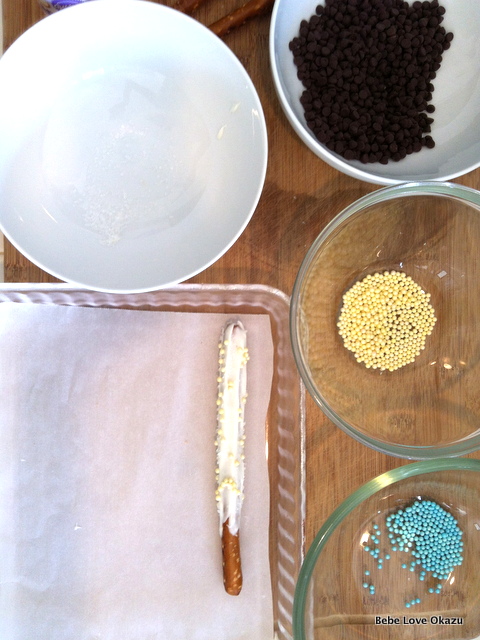
Wedding colors are Tiffany blue and coral. I attempted to keep the favors aligned with these colors, although the white pearl sprinkles appear more banana yellow in the photo above.
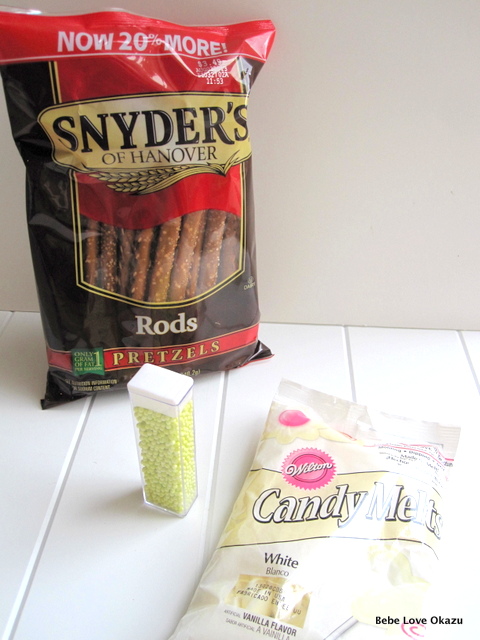
The ingredients for the candied rods are simple: Snyder’s of Hanover pretzel rods, candy melts (or chocolate bark), sprinkles, and the secret ingredient for keeping the melted candy smooth and thin – vegetable shortening.
The process of making the candied pretzels is fairly simple, but if you’re making roughly 40 pretzels, you might want to set aside some time, especially if you’ve got a cute preschooler who likes to come into the kitchen to ask you to come and play with her.
Here are a few basic tips for making pretzel rods:
1. Line your “drying tray” with parchment paper to prevent the candied pretzels from sticking.
2. Use separate bowls for each type of sprinkles or add-ons that you’ll be using as decorative toppings for the pretzel rods. Hold the pretzel over each bowl to catch the excess sprinkles / add-ons.
3. Definitely thin the candy melt with vegetable shortening. It makes the melted candy go on the pretzel smoother.
4. To expedite the drying process, pop the drying tray in the freezer for no more than 10 minutes after you’ve decorated the pretzel with sprinkles.
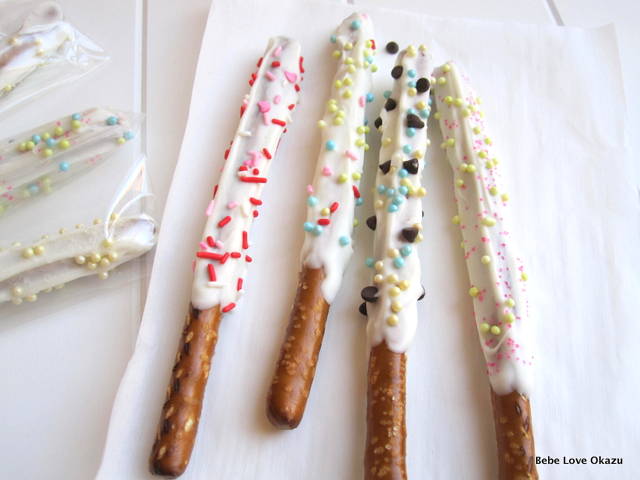
5. For larger and heavier decorative items such as mini chocolate chips, chunks of candy or nuts, place the candy coated pretzel in the freezer first, without the toppings, for just 3 to 5 minutes so that the candy is just warm, still pliable, but not dripping wet. If the melted candy is dripping wet, your heavier toppings will just slide off the pretzel rod and not adhere to it like you want. Instead, allow the melted candy to firm slightly, just enough so that you can PRESS the toppings gently into the melted candy. Afterwards, pop the decorated pretzels back into the freezer for another 5 minutes until the candy and toppings are firmly secured on the pretzels.
6. Do not leave the decorated pretzels in the freezer or the refrigerator. If you chill the pretzel rods for too long, when you remove them from the refrigerator and bring them to room temperature you will find condensation on the candied portion of the pretzels which will discolor the sprinkles or just make things messier than you want them to be. Trust me, leave them at room temperature. They will look prettier that way.
In the end, you should have a beautiful arrangement of pretzel rods, just waiting to be taken home. As you can see from the photos, I managed to stuff (just barely) two pretzel rods per plastic bag. The plastic bags are available at most craft supply stores and fit pretzel rods perfectly.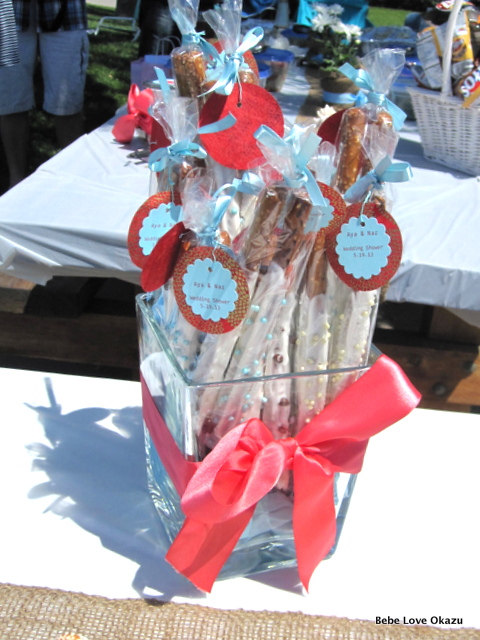
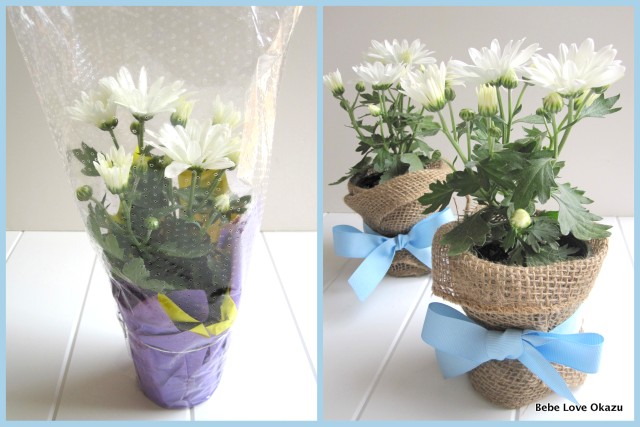
I wanted to share a quick little craft that I did to improve store-bought potted daisies as decorative pieces for the picnic – shower. These proved to be cute little gifts for the bride-to-be and mother-of-the-bride to take home. On the left are $1.99 potted daisies from Trader Joes. A simple makeover of a ziplock sandwich bag (to wrap around the pot to contain water when it is watered), then covered with burlap (an inexpensive yet stylish decorative piece), and tied with cross-grain ribbon in the color of the bride and groom’s wedding color. Voila! Two sweet little potted flowers to adorn our simple picnic table.
As you can see from the photo below, it was truly a beautiful day for showering the newlyweds-to-be with good food, treats and of course, plenty of laughter, fun, and love. After our picnic we all walked down to the beach and played in the waves, explored the tide pools and enjoyed a fabulous day together.
- 20 pretzel rods
- 1 bag of vanilla flavored candy melts
- 1 tablespoon vegetable shortening
- Mini chocolate chips
- Decorative pearl sprinkles
- White sparkling sugar sprinkles (by Wilton)
- Other toppings: chopped nuts, chopped candy (Reese's Peanut Butter Cups), mini M & M's.
- Line tray with parchment paper.
- Set-up empty bowls for each type of sprinkle / topping.
- Melt candy melts in a medium bowl in the microwave for 1 to 2 minutes (depending on your microwave). Stir occasionally until candy melts are smooth and completely melted.
- Add vegetable shortening to melted candy and mix well.
- Work quickly to coat each pretzel rod with a spatula or spoon, turning the pretzel rod as you go to completely coat the rod.
- Rest the wet pretzel rod on the parchment paper and freeze for 3 to 5 minutes until the candy melt is slightly firm. Remove from freezer and apply pearl sprinkles or mini chocolate chips. Gently PRESS into the candy melt. Return the candied pretzel rod back in the freezer for 5 to 10 minutes until firm.
- Remove pretzel rod from freezer and allow it to rest at room temperature.
- Package each pretzel rod in a clear cellophane bag. Store at room temperature.



3 Comments