Ohagi (Sweet Rice Mochi) & Kodomo No Hi 2010 (Japanese Childrens & Boys Day)
Happy Boy’s Day! Er, excuse me… allow me to politically correct myself – Happy Children’s Day!
Although May 5th is widely known as Cinco de Mayo for many across the world, the fifth day of the fifth month is also known as kodomonohi or Boy’s Day in our family.
May 5th, or Boy’s Day was originally known in Japan as “Tango no Sekku“, or Boy’s Festival, to celebrate the healthy growth and happiness of young boys, much in the same way Girl’s Day or “Hinamatsuri” is celebrated on March 3rd (the third day of the third month) for girls.
May 5th, however, is a national holiday in Japan, and in 1948 Boy’s Day was changed to kodomonohi or Children’s Day, to recognize both boys and girls nationally, since Girl’s Day was not a national holiday. Today, despite this change, kodomonohi is still widely celebrated as Boy’s Day.
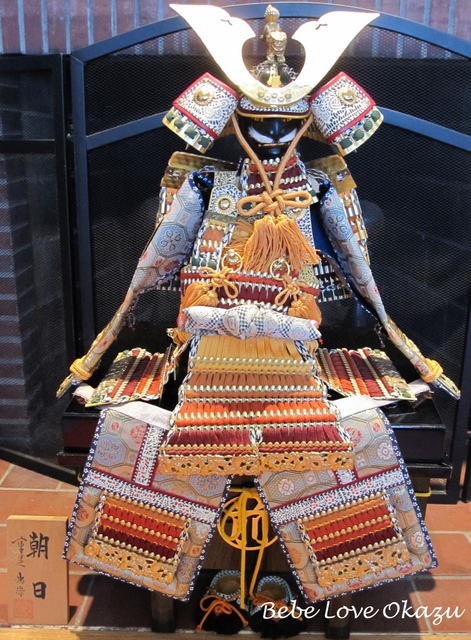
One of the ornamental traditions associated with Boy’s Day is the Gogatsu-ningyo. The samurai warrior doll pictured above is my brother’s doll that was sent from Japan when he was born (a gift from my Aunt and Uncle N). My brother is younger than I, so as long as I can remember, my parents displayed this doll annually in late April through May 5th. This year, just as my parents did last year, they displayed my brother’s gogatsu-ningyo for their baby grandson Q.
When I Googled Gogatsu-ningyo, I found a website for a Master Craftsman that makes Gogatsu-ningyo and Hina-ningyo in Japan. There was a very detailed page on the History of the Gogatsu-ningyo, as well as hina-ningyo if you are interested in learning more about the dolls and Boy’s Day and Girl’s Day in Japan.
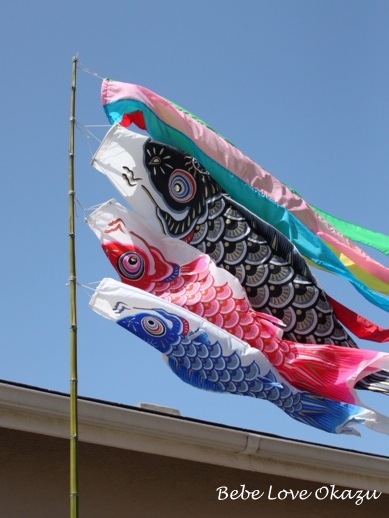
In addition to Gogatsu-ningyo, yet another distinct memory I have from my childhood is carp streamers flying over the corner rooftop in the back of our home. Another ornamental tradition associated with Boy’s Day is koinobori. These are carp-shaped streamers or wind socks that are made of paper or cloth, and hoisted on a bamboo pole high above rooftops.
The largest black carp represents the father, the red carp represents the mother, and the smaller carp represents the son in the family. If there is more than one son in the family, additional different colored carp are attached beneath the eldest son.
Today, in honor of Boy’s Day / Children’s Day my mom decided to host a lunch party for my baby nephew Q, my sister-in-law’s parents (who watch him while his parents are at work), and bebe E and myself. Since my mom made lunch, I offered to make wagashi for dessert.
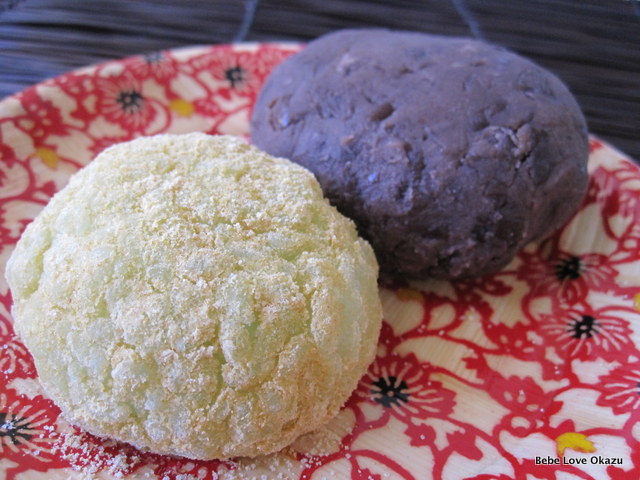
In Japan, kashiwamochi, or rice cakes wrapped in oak leaves, is traditionally eaten on Boy’s Day / Children’s Day. However, this year, in honor of kodomonohi I decided to make ohagi, which is what my mom used to make for Boy’s Day. This is a sweet rice ball wrapped with tsubuan(red bean paste)or dusted with kinako (soy bean flour) or kurogoma (black sesame seeds).
This is my first attempt at making ohagi (yikes) but it turned out nicely. :)
Kinako ohagi (front) and tsubuan ohagi (back).
These are plain mochigome rice balls with no filling in the center.
As a kid, I helped my mom shape the mochi into balls and coat them with kinako. This was, and still is, my favorite ohagi. Unfortunately, because I don’t like sweet red bean paste in wagashi (although oddly enough I like it in soup), I never wanted to help my mom wrap the mochi in tsubuan, so I never learned… Bad daughter! Making tsubuan ohagi turned out to be a fun learning experience, and it turned out OK.
Before we get started, however, here are some Googled factoids regarding ohagi according to About.com. Ohagi, is a term that refers to sweet rice balls that are offered during the autumnal equinox of “higan“, a Buddhist event where people prayed for their ancestors. The same autumnal sweet rice balls offered during the spring equinox of higan are called botamochi. Today, ohagi is more commonly used to refer to sweet rice balls year-round.
Ohagi
for mochi / rice balls:
(makes 12 – 16)
- 3 cups mochigome (sweet, glutinous rice)
- 3 cups water
- 1 drop blue food coloring
for tsubuan:
- 4 cups tsubuan (red bean paste)
Click here for tsubuan recipe
for kinako:
- 1/2 cup kinako (soy bean flour)
- 3 to 4 tablespoons granulated sugar
1) Make tsubuan according to recipe, and allow this to cool to room temperature. Refrigerate if necessary. If you do refrigerate this, reheat it before using it to wrap the ohagi. Sprinkle a little water over the tsubuan and microwave for 30 seconds to a minute.
Tsubuan is a textured red bean paste cooked with the skin of the beans still on. There are many terms that refer to sweet red bean paste, such as anko, koshian, tsubuan, or tsubushian. Among my Japanese-American friends, we all refer to this as anko. Among my mom’s friends… I hear all different terms and while there might be subtle differences (smooth, lumpy, red beans, white beans), ultimately they’re referring to bean paste.
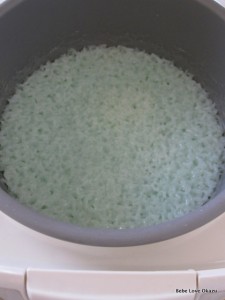
2) Wash mochigome well, until the water is clear. Drain, then let stand for 30 minutes. Add 3 cups water according to your rice cooker’s measurement guideline. Add 1 drop of blue food color to make teal-colored mochi. I did this since it’s Boy’s Day and I thought it would be more festive. :)
If you aren’t planning to make the rice balls immediately, use your rice cooker’s warming mode to keep the rice warm until you’re ready. I made the sweet rice the night before.
3) Before I get started, I allow the rice to cool down by scooping some of it into a large bowl. Cut a few sheets of plastic cling wrap to make the rice balls. The plastic wrap is only good for making a few rice balls before it gets too sticky, but it really helps to cut down on the mess. I also use this technique when making mentaiko onigiri/ rice balls.
Lay a piece of plastic wrap on a tray to rest your mochi after you’ve shaped them into balls. You may want to prepare a second tray, also lined with plastic wrap to rest the ohagi after you’ve coated them with tsubuan and kinako.
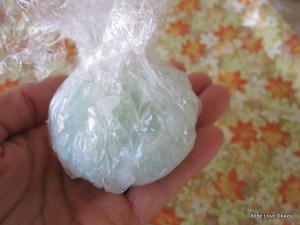
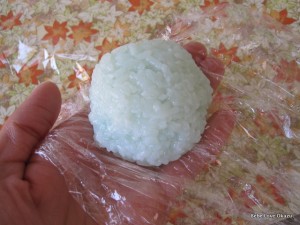
Take a piece of plastic wrap and lay this on the palm of your hand. Scoop about 2 – 3 tablespoons of rice into your hand, wrap it in plastic wrap and shape into ovals or circles. I made little round balls, but my mom makes oval-shaped mochi for ohagi. After trying to make one oval-shaped, I decided I’m better at making them round (it’s easier). Just pinch the cling wrap closed around the ball to help shape the mochi into a nice smooth ball.
Let the mochi cool to room temperature if it hasn’t done so already. This will be easier when working with the tsubuan.
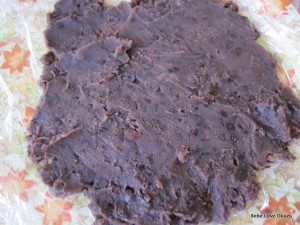
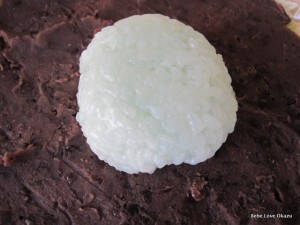
4) To make tsubuan ohagi, take a clean piece of plastic wrap and spread 3 – 4 tablespoons of tsubuan using a spatula. This should be thick enough so that the mochi doesn’t peek through the tsubuan.
Place a rice ball in the center of the tsubuan. You might want to place the top-side of your mochi face down on the tsubuan, since the bottom of the tsubuan will become the top of the ohagi. (Is that confusing? – My apologies.) I found that most of my mochi look better on one side than the other because of my plastic wrap technique. In the photo below, you’ll see that I placed the mochi exactly opposite of how I suggested. (Sigh – this is my Type A personality shining.)
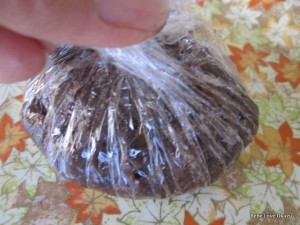
Gently pull the sides of the cling wrap, one side at a time. There will likely be excess tsubuan as you wrap the mochi. Gently scrape the excess with a spatula and return to the bowl for use with the next mochi. You may also need to smoothe some of the rough edges using the cling wrap, or your finger.
When you are done wrapping the mochi with tsubuan (it should still be resting on the cling wrap), gently close the cling wrap and pinch the cling wrap to shape the ohagi once more into a nice round ball.
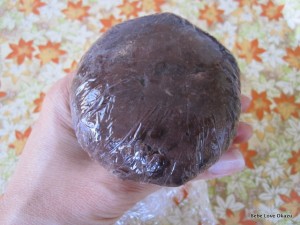
Flip the cling-wrapped ohagi over, double check the shape of it – make sure you like it – because once you remove the plastic wrap it will be extremely difficult to shape the ohagi without damaging the tsubuan wrapped around the mochi.
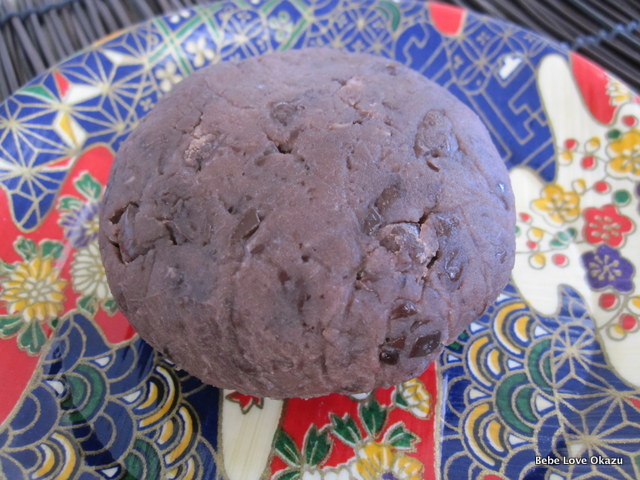
Remove the cling wrap, and lay the tsubuan ohagi on a plate or tray.
My mom gave me an assortment of little bamboo plates decorated
with beautiful Japanese floral designs. I love these! Thanks, Mom!
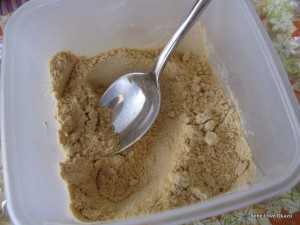
5) To make kinako ohagi, first mix kinako powder and sugar together in a small bowl and set aside.
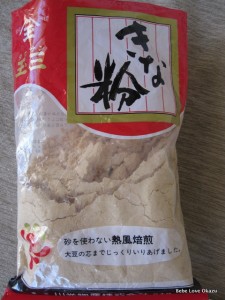
Kinako / soy bean flour can be found at Japanese supermarkets, and likely at other Asian markets too.
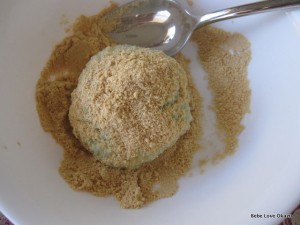
Place some of the kinako mixture in a small bowl, and gently rest mochi on the powder. Gently spoon the kinako over the mochi.
It’s best to dust the kinako ohagi just before serving. As the kinako ohagi sits, the powder becomes damp from the mochi. If this happens, just dust the ohagi once more with additional kinako.
Beautiful wagashi dessert for a special Japanese holiday – Kodomonohi / Children’s Day / Boy’s Day.
Happy Children’s Day!
- FOR OHAGI (MOCHI RICE BALLS):
- 3 cups mochigome (sweet, glutinous rice)
- 3 cups water
- 1 drop blue food coloring
- FOR TSUBUAN (SWEET RED BEAN PASTE):
- 4 cups tsubuan (red bean paste) (see Recipe page on BebeLoveOkazu.com)
- FOR KINAKO POWDER:
- ½ cup kinako (soy bean flour)
- 3 to 4 tablespoons granulated sugar (to taste)
- 1 - 2 dashes of salt
- MAKE TSUBUAN: See BebeLoveOkazu.com Recipe page for details). Allow this to cool to room temperature. Refrigerate if necessary. If you do refrigerate this, reheat it before using it to wrap the ohagi. Sprinkle a little water over the tsubuan and microwave for 30 seconds to a minute.
- Wash mochigome well, until the water is clear. Drain, then let stand for 30 minutes. Add 3 cups water according to your rice cooker's measurement guideline for mochi. Add 1 drop of blue food color to make teal-colored mochi. Once cooked, if you aren't planning to make the rice balls immediately, use your rice cooker's warming mode to keep the rice warm until you're ready.
- Before getting started, allow the rice to cool down by scooping some of it into a large bowl. Cut a few sheets of plastic cling wrap, which will be used shape the ohagi rice balls.
- Next, cover a large tray with plastic wrap. This is where you'll rest your mochi after you've shaped them into balls. You may want to prepare a second tray, also lined with plastic wrap to rest the ohagi after you've coated them with tsubuan (sweet red bean paste) and kinako (soy bean powder).
- MAKE OHAGI MOCHI BALLS: Take a piece of plastic wrap and lay this on the palm of your hand. Scoop about 2 - 3 tablespoons of rice into your hand, wrap it in plastic wrap and shape into ovals or circles. I make round balls, but my mom makes oval-shaped mochi for ohagi. Pinch the cling wrap closed around the ball to help shape the mochi into a nice smooth ball.
- Let the mochi cool to room temperature if it hasn't done so already. This will be easier when working with the tsubuan.
- MAKE TSUBUAN OHAGI: Take a clean piece of plastic wrap and spread 3 - 4 tablespoons of tsubuan using a spatula. This should be thick enough so that the mochi doesn't peek through the tsubuan. Place a rice ball in the center of the tsubuan. You might want to place the top-side of your mochi face down on the tsubuan, since the bottom of the tsubuan will become the top of the ohagi. (Refer to photos on BebeLoveOkazu.com for details.)
- Gently pull the sides of the cling wrap, one side at a time. There will likely be excess tsubuan as you wrap the mochi. Gently scrape the excess with a spatula and return to the bowl for use with the next mochi. You may also need to smoothe some of the rough edges using the cling wrap, or your finger.
- When you are done wrapping the mochi with tsubuan (it should still be resting on the cling wrap), gently close the cling wrap and pinch the cling wrap to shape the ohagi once more into a nice round ball.
- Flip the cling-wrapped ohagi over, double check the shape of it - make sure you like it - because once you remove the plastic wrap it will be extremely difficult to shape the ohagi without damaging the tsubuan wrapped around the mochi.
- Remove the cling wrap, and lay the tsubuan ohagi on the plastic wrap lined tray.
- MAKE KINAKO OHAGI: First mix kinako powder and sugar together in a small bowl and set aside. (Kinako or soy bean flour can be found at Japanese supermarkets, and likely at other Asian markets too.) Place some of the kinako mixture in a small bowl, and gently rest mochi on the powder. Gently spoon the kinako over the mochi.
- TIP: It's best to dust the kinako ohagi just before serving. As the kinako ohagi sits, the powder becomes damp from the mochi. If this happens, just dust the ohagi once more with additional kinako.


2 Comments