Kakiage (Mixed Tempura) & Tempura Sauce
We all know fried food is bad for us, but how can you resist crispy, crunchy, tasty tempura? Forget about your cholesterol level, forget about those jeans you’ve been wanting to get back into, forget about your New Year’s resolution to eat healthier.
Throw all of that out the door and simply, LOVE tempura with me, just for a little while. :)
I don’t eat tempura often (only when dining at a good Japanese restaurant), but I finally caved in and decided to make this at home… starting with kakiage. I could have made regular tempura which is less complicated to make – dipping individual pieces of vegetables and seafood in batter, then frying them…
But NO, I had a craving for kakiage – the kind my mom used to make when we were kids… mixed julienned vegetables and shrimp… and bebe dada knows best, that when I have a food craving I MUST eat it, right away!
As a kid, we didn’t eat this often since fried foods are bad for us, but after Monday night, I’m a firm believer that we didn’t have kakiage often because it’s A LOT of work. Thanks mom, for all those times you made this for us – ganbatta-ne (kudos)!
I’m lucky my BFF (best friend forever) was free for dinner on Monday night because earlier in the day I tricked her into coming over with a dramatic, “OooOOOooooOOOohhHHhHH, I’m making KA-KI-AGE TEMPURA tonight, wanna come over?”
We already spent her day-off shopping and dining at my favorite Nordie’s Cafe for lunch. I was pretty sure she had enough of bebe E squealing (ok, screaming at the top of her lungs in the car and in the restaurant), as well as banging her hands loudly on the Cafe table, much to the disgust of 2 women in the Cafe… but she agreed to come over anyway. (Yay for me!)
I don’t think I told her right away that I never made kakiage before. She cooks really well, and it’s a good thing she came over and helped me fry them, otherwise bebe dada and I would have been eating soggy, pale, likely-undercooked-tempura all by our very sad selves.
Mom’s Kakiage Tempura
for kakiage:
- 2 medium carrots
- Large handful of green beans
- 1 cup gobo (burdock)
- 1 medium onion
- 1/3 pound shrimp
(makes 10 -12 kakiage)
for tempura batter:
- 1 cup sifted flour
- 1 cup and 3 tablespoons of ice-cold water
- 1 egg
- Canola oil for frying
for tempura sauce:
- 2 1/2 cups water
- Piece of konbu dashi (dried kelp)
- 1 small package of katsuo bushi (dried bonito flakes)
- 1/4 cup shoyu (soy sauce)
- 2 tablespoons mirin
- 1/4 teaspoon dried dashi powder
1) I started by making the tempura sauce the night before. Boil water and add dashikonbu and katsuo bushi, reduce heat to low and simmer for 10 minutes. Addshoyu, mirin, and dried dashi powder. Simmer for another 5 minutes and remove from heat. Remove konbu and discard. Once it cools, store in the fridge. I warm-up the sauce in the microwave before serving in individual cups.
I also julienned the vegetables the night before to save time. This was a REALLY good thing that I did, because it took me FOREVER to clean the fresh shrimp and figure out how to get the batter right. On top of that, battering the kakiage was a challenge. Then, after numerous phone calls to my mom, and frying help from my BFF, our 7pm dinner turned into our 8:30pm dinner… and if I hadn’t julienned veggies ahead of time, we would have been eating at midnight.
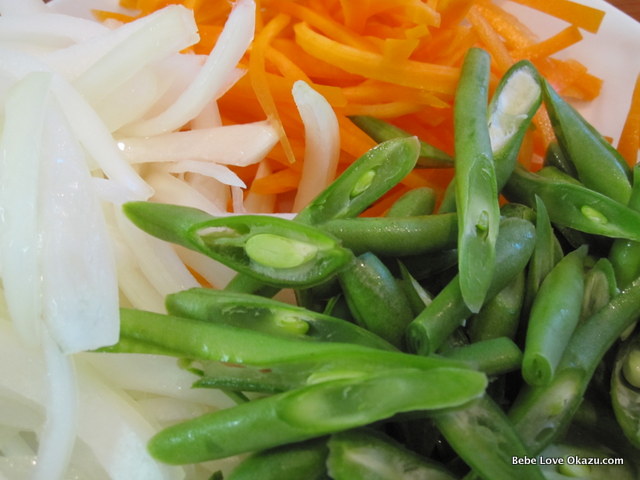
2) I used a mandolin to julienne the carrots, about 2 – 3 inches long.
3) I sliced the onion in little 1/2 moon shapes, cutting the onion in half on the horizontal, then vertically (from head to toe).
4) Next, I cleaned the green beans and sliced these on the diagonal. When my mom instructed me to cut these on the diagonal, I said to her that slicing the beans weren’t a good idea because the little beans would fall out or get cut-up, and that it might be better to keep the beans whole. She just said in Japanese, “don’t worry, it’ll be fine.”
She was right. It was better to have smaller bites of the green beans, and I made sure that all the little bean particles were mixed in with all the other vegetables in the batter.
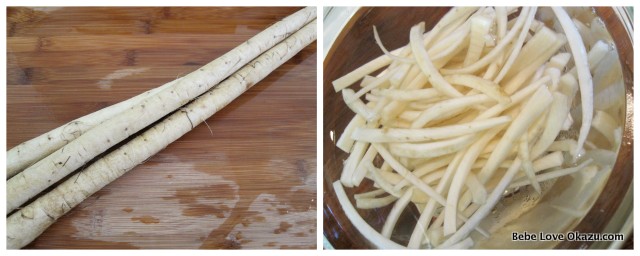
5) I bought a 3-pack of gobo at the Korean supermarket for only $1.67. I thought this was a pretty good deal, although I haven’t decided what I’m going to do with all of this gobo yet.
Peel the gobo using the edge of the knife, scraping it downward, away from you. Cut julienne slices about 2 -3 inches long, and soak these in a bowl of cold water. The gobo will quickly turn color if you don’t soak them. You can leave them soaking in the fridge overnight if you need to.
6) I bought fresh shrimp since it was on sale. At first, I thought this was a great idea, but I quickly realized cleaning shrimp is a lot of work. I used to overhear my mom asking my dad to peel the shrimp because the shrimp would make her hands itchy. I think I inherited itchy-shrimp-hands from mom. In the past, I never bought fresh shrimp because it seemed like too much work… and I was right.
Frozen, peeled, deveined shrimp will work just fine the next time I make kakiage. This will save me about 20-30 minutes. Bebe dada asked why I didn’t buy the shrimp over at Costco. I guess they sell shrimp that’s already been cleaned and fresh? Or is it frozen?
Anyway, I did my Google research as always by reviewing About.com’s “How to Clean Shrimp” article. Luckily, the heads of my shrimp were already removed, but that’s the first thing you remove by gently separating the head from the body if you buy them with the heads attached. Next, pull the legs off – this part was a bit tedious. As you pull the legs, sometimes the shell will peel off too. If not, that’s the next step – peel off the shell. Finally, gently pull the tail off. I deveined my shrimp using a small pairing knife.
30 minutes later, with little shrimp legs all over the sink and itchy hands… clean, chopped shrimp. Keep the shrimp cold by placing them in a bowl on ice, or just stick them back in the fridge.
7) Pour canola oil into a deep pot and heat oil on medium until the oil reaches approximately 340 degrees F.
I have to admit that I didn’t own a candy thermometer until I decided to make kakiage. I guess it was a good excuse for me to buy one so I could see the exact temperature of the oil – good news: under $10.
If you don’t have a candy thermometer, seriously, you don’t need one. Just test your oil by dropping a small bit of batter into the oil and if it quickly starts to sizzle – it’s ready. Just make sure the oil isn’t smoking – that’s probably too hot and your tempura might burn.
8) Make the batter just before you’re ready to start frying the kakiage.
I bought packaged tempura kona, and now I understand why my mom was slightly bent out of shape when I told her that I did. I spent $3 – 4 dollars on a small 250 gram pouch of tempura batter. It’s essentially sifted flour in a pouch. I used this for half the kakiage, and when I ran out, I made batter using my mom’s recipe and I couldn’t tell the difference.
According to my mom, the key to making the batter is using ice-cold water. Apparently this is what makes the tempura crunchy.
In a large bowl, add sifted flour, 1 beaten egg and ice-cold water. I used water that I keep in the fridge and the kakiage turned out crispy. Next time I’ll try adding a few ice cubes to the water first and see if that makes a difference. (If you try this, please let me know how it turns out.) Gently mix the batter using a whisk but don’t over mix the batter.
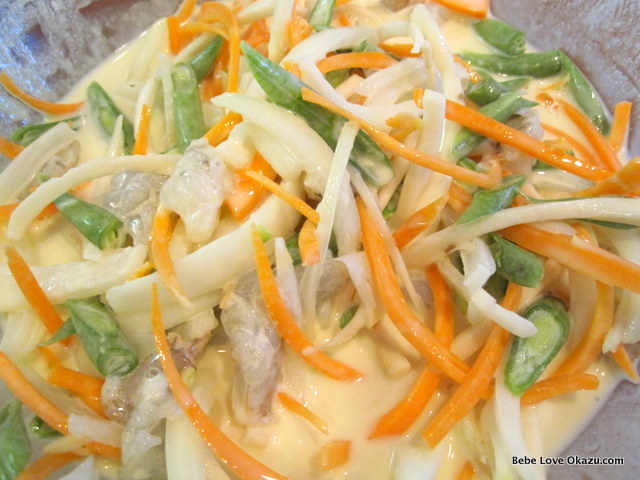
9) Add 1/2 cup of each vegetable and shrimp into the batter. Gently toss until all of the ingredients are coated.
10) Set-up trays or plates lined with paper towels to drain the fried kakiage after pulling them from the oil.
Make sure the oil is hot enough. Using a ladle, scoop about 1/2 cup of battered ingredients and drop into the oil. Fry for 4 minutes then flip over and cook for another 4 minutes. Repeat if necessary until both sides are really crunchy looking – a deep golden brown.
When my BFF arrived, I had already made a few bad kakiage – pale, mushy looking tempura. She took over frying for a while and suggested frying them longer until they were really golden. This worked. And she put more than one scoop in the oil at a time. Good thing… otherwise we wouldn’t have eaten until midnight. I actually went back and re-fried the first few that were a little undercooked and they came out looking golden and crispy.
I set the oven to 180 degrees F and kept the kakiage warm until we were ready to eat.
Almost 3 1/2 hours after I started cooking (and I should mention while watching bebe E – not an excuse), we were finally able to enjoy our kakiage dinner. :)
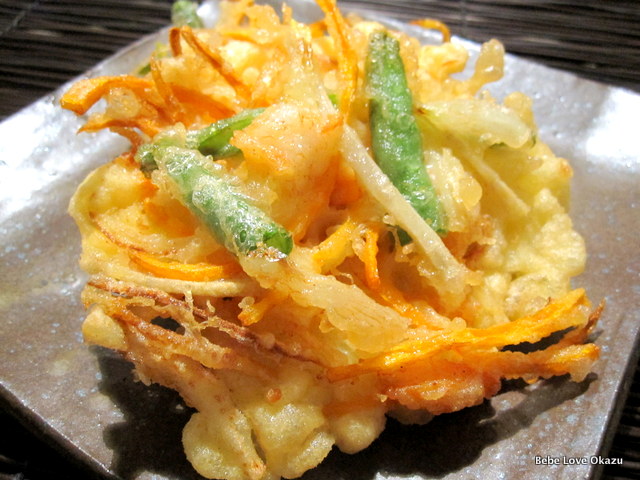
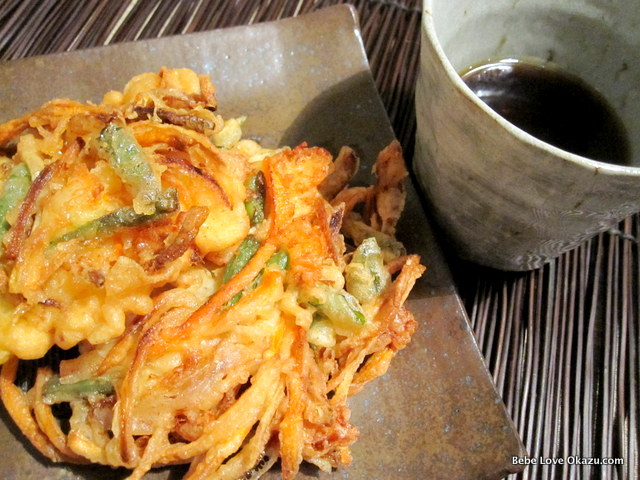
Green bean, onion, carrot, gobo, and shrimp kakiage with tempura sauce.
BFF mentioned a few other ingredients for kakiage that her mom uses, and I think I will try these next time I make kakiage. She enjoyed her dinner. (Yay!)
Bebe dada also seemed to enjoy dinner and ate 3 kakiage patties, contemplated a 4th but decided that he needed to watch his “girlish figure” (this is how he jokes of his expanding waistline ever since he met me). I asked if I should add this to our dinner repertoire and he said, “yes”.
It will probably be a little while before I make kakiage again (I need a break), but I’m certain that if I make this a few more times I’ll become faster at prepping, and now that I have the battering and frying technique down, it should be easier the next time around.
Oh, and aloha girl asked me if I had Googled “kakiage” for interesting tidbits and I almost forgot to include this fact that most of you likely won’t even read because this post is sooooo long, but I am including it anyway for those of you who have made it this far. :)
Tempura was introduced to Japan by the Portuguese back in the mid-1600’s and is likely derived from the Latin word, “tempora” meaning “time period”. Some believe that tempura originated from the Portuguese and Spanish periods of lent when fish and vegetables were eaten in lieu of meat. This might explain why tempura is primarily vegetables and seafood, and not meat. There ya go!
If you have any questions or would simply like to leave me a comment, please do so! I would enjoy hearing from you and I welcome all questions. :)
Judy | bebe mama
- FOR KAKIAGE:
- 2 medium carrots
- Large handful of green beans
- 1 cup gobo (burdock root)
- 1 medium onion
- ⅓ pound shrimp (makes 10 -12 kakiage)
- FOR TEMPURA BATTER:
- 1 cup sifted flour
- 1 cup and 3 tablespoons of ice-cold water
- 1 egg
- Canola oil for frying
- FOR TEMPURA SAUCE:
- 2½ cups water
- Piece of konbu dashi (dried kelp)
- 1 small package of katsuo bushi (dried bonito flakes)
- ¼ cup shoyu (soy sauce)
- 2 tablespoons mirin
- ¼ teaspoon dried dashi powder
- PREPARE TEMPURA SAUCE: Boil water and add dashi konbu and katuso bushi, reduce heat to low and simmer for 10 minutes. Add shoyu, mirin, and dried dashi powder. Simmer for another 5 minutes and remove from heat. Remove konbu and discard. Once it cools, store in the fridge. I warm-up the sauce in the microwave before serving the sauce in individual cups.
- PREPARE KAKIAGE VEGETABLES: Julienne the vegetables using a mandolin: carrots into 2 to 3 inch length pieces.
- Sliced the onion in little ½ moon shapes, cutting the onion in half on the horizontal, then vertically (from head to toe).
- Next, clean the green beans by removing the vein and sliced these on the diagonal.
- Peel the gobo using the edge of the knife, scraping it downward, away from you. Cut julienne slices about 2 -3 inches long, and soak these in a bowl of cold water. The gobo will quickly turn color if you don't soak them. You can leave them soaking in the fridge overnight if you are prepping a day ahead.
- Peel and devein shrimp. Then chop shrimp into bite-sized pieces.
- Pour canola oil into a deep pot and heat oil on medium-high until the oil reaches approximately 340 degrees F.
- PREPARE BATTER: If you are not using prepared tempura batter, in a large bowl, add sifted flour, 1 beaten egg and ice-cold water. Use cold seltzer water for light and crisp results. Gently mix the batter using a whisk but don't over mix the batter.
- Add ½ cup of each vegetable and shrimp into the batter. Gently toss until all of the ingredients are coated.
- Set-up trays or plates lined with paper towels to drain the fried kakiage after pulling them from the oil.
- Make sure the oil is hot enough. Using a ladle, scoop about ½ cup of battered ingredients and drop into the oil. Fry for 4 minutes then flip over and cook for another 4 minutes. Repeat if necessary until both sides are really crunchy looking - a deep golden brown.
- Serve kakiage tempura with hot tempura sauce.


22 Comments